OBS Studio: The Ultimate Guide
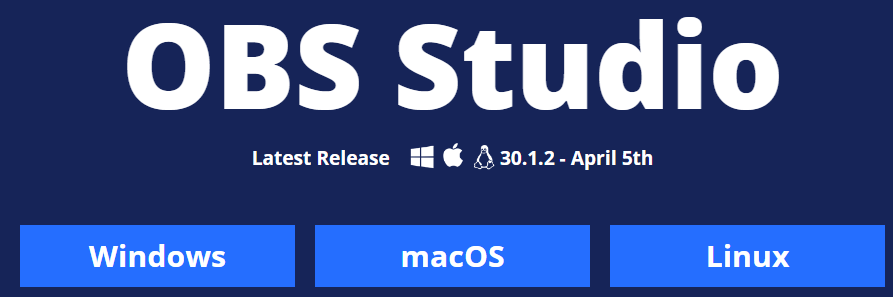
Download OBS Studio (Open Broadcaster Software) is a powerful, free, and open-source software for video recording and live streaming. It is widely used by content creators, gamers, educators, and professionals for its robust features and flexibility. This guide will provide an overview of OBS Studio, its key features, installation process, and how to effectively use it for your recording and streaming needs.
OBS Studio New Features 2025
OBS Studio has recently introduced several noteworthy features and updates that enhance the streaming and recording experience:
1. NVIDIA Blur Filter and Background Blur
The latest release includes new filters leveraging NVIDIA Video Effects, allowing users with compatible NVIDIA RTX GPUs to apply background blur effects to their video sources, enhancing visual quality without the need for additional software. OMG! Ubuntu+1It’s FOSS News+1
2. First-Party YouTube Chat Integration
Streamers can now access YouTube Chat directly within OBS Studio, streamlining interactions with viewers and reducing the need for external browser windows during live streams.
3. Enhanced User Interface
The user interface has received visual updates, providing a more intuitive and streamlined experience for users.
4. Hybrid MP4 Recording Format
A new Hybrid MP4 recording format has been introduced, offering greater flexibility and compatibility for recorded content. OBS Studio+1OBS Studio+1
5. Multitrack Video Output
This version includes support for multitrack video output, allowing for more detailed post-production editing and audio management. OBS Studio+1OBS Studio+1
6. Versioning Changes
To improve clarity and consistency, OBS Studio has revised its versioning system, aiming to make release information more straightforward for users. OBS Studio
These updates reflect OBS Studio’s commitment to providing powerful, user-friendly tools for content creators, ensuring a seamless and enhanced streaming experience.
Key Features
- Cross-Platform Compatibility: OBS Studio is available on Windows, macOS, and Linux, ensuring that users across different operating systems can utilize its capabilities.
- High-Performance Real-Time Video/Audio Capturing and Mixing: OBS Studio provides high-quality recording and streaming with minimal resource usage.
- Multiple Sources and Scenes: Easily switch between multiple scenes made up of multiple sources including window captures, images, text, browser windows, webcams, capture cards, and more.
- Audio Mixer: An intuitive audio mixer with per-source filters such as noise gate, noise suppression, and gain.
- Modular ‘Dock’ UI: Customize the layout to suit your preferences and save different layout profiles.
- Studio Mode: Preview your scenes and sources before pushing them live.
- Powerful Configuration Options: Detailed settings for encoding, recording, and streaming ensure optimal performance for different types of content.
- Streamlined Settings Panel: A streamlined settings panel ensures quick configuration of broadcasts and recordings.
- Plugin Support: Extend OBS Studio’s functionality with plugins and scripts from the community or develop your own.

Using OBS Studio
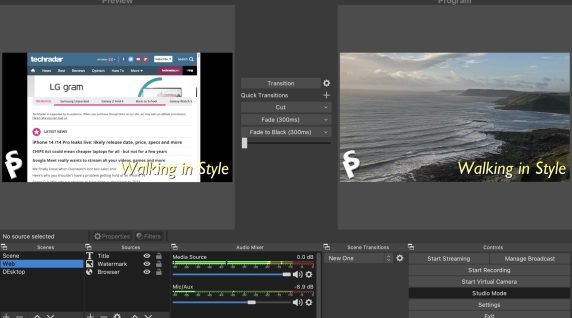
Setting Up Your First Scene
- Open OBS Studio and go to the “Scenes” panel at the bottom left.
- Add a Scene:
- Click the
+button to add a new scene. - Name your scene and click “OK”.
- Click the
- Add Sources:
- In the “Sources” panel, click the
+button. - Select the type of source you want to add (e.g., Display Capture, Window Capture, Video Capture Device for webcams, etc.).
- Configure the settings for each source and click “OK”.
- In the “Sources” panel, click the
Configuring Audio
- Access Audio Settings:
- Go to “File” > “Settings” > “Audio”.
- Set Audio Devices:
- Configure your desktop audio and microphone/auxiliary audio devices.
- Adjust Audio Levels:
- Use the audio mixer at the bottom of the OBS interface to adjust volume levels and apply filters.
Recording
- Configure Recording Settings:
- Go to “File” > “Settings” > “Output” and select the “Recording” tab.
- Choose your recording path, format, and quality settings.
- Start Recording:
- Click the “Start Recording” button on the main OBS interface.
- Click “Stop Recording” when finished.
Streaming
- Configure Streaming Settings:
- Go to “File” > “Settings” > “Stream”.
- Select your streaming service (e.g., Twitch, YouTube, Facebook Live) and enter your stream key.
- Start Streaming:
- Click the “Start Streaming” button on the main OBS interface.
- Your stream will go live on the configured platform.
- You can also use VLC Player list for live stream.
- How to use VLC Player in OBS Click Here.
- Configure Streaming Settings:
Tips for Effective Use
- Optimize Performance:
- Adjust your video settings under “Settings” > “Video” to match your hardware capabilities.
- Lowering the base (canvas) resolution or output (scaled) resolution can help improve performance on lower-end systems.
- Use Hotkeys:
- Set up hotkeys for switching scenes, starting/stopping recording, and more under “Settings” > “Hotkeys”.
- Monitor Resource Usage:
- Keep an eye on your CPU and memory usage to ensure OBS Studio runs smoothly alongside other applications.
- Leverage Plugins:
- Explore the OBS Studio community for plugins that add functionality such as advanced transitions, countdown timers, and more.
Conclusion
OBS Studio is an incredibly versatile and powerful tool for anyone needing to record or stream video content. Its rich feature set and flexibility make it suitable for a wide range of uses, from gaming and live streaming to professional webinars and tutorials. By following this guide, you can set up and start using OBS Studio effectively, tailoring it to your specific needs for the best recording and streaming experience.